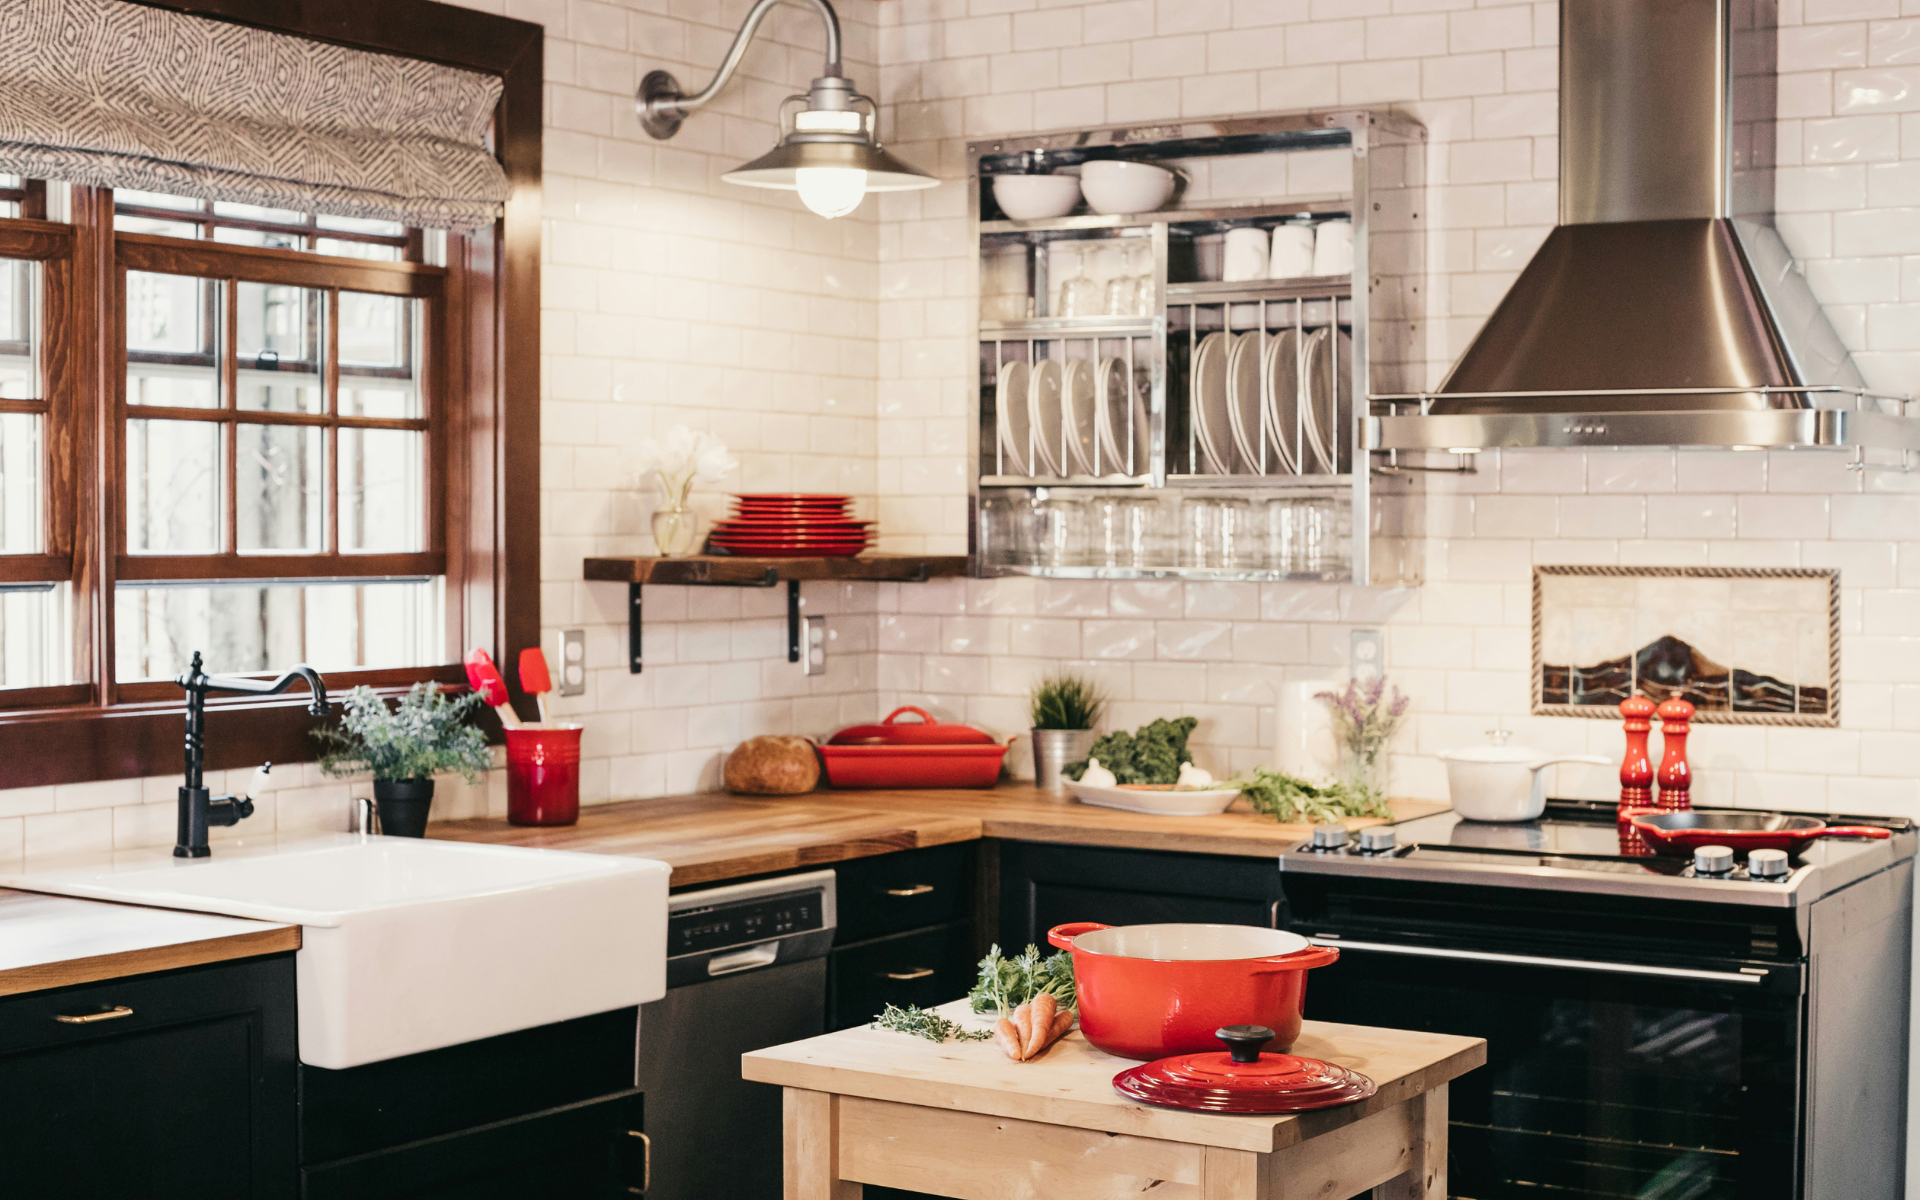


Kitchen remodels are a top priority for many homeowners looking to refresh their space. And a gorgeous new backsplash can entirely transform the look of your kitchen and bath. An eye-catching backsplash protects the wall between countertops and upper cabinets from stains while serving as a chic focal point.
But many eager DIYers spend good money on kitchen remodeling only to find their new backsplash has issues like uneven tiles, sloppy grout lines, and mismatched colors. Don’t let amateur mistakes ruin your design plans and leave you needing an expensive fix!
Read on to discover insider tips from interior designers on executing a flawless kitchen backsplash project that upgrades your space with a gorgeous, enduring style. Let’s explore how a bit of know-how can help you avoid common backsplash headaches and get things right the first time around!
Choosing the Wrong Tile Size
Tile comes in a vast range of sizes, shapes, colors, and materials. Glass, ceramic, porcelain, metal, and natural stone tiles can all work beautifully for backsplashes. However, choosing the wrong scale of tile for your powder room or kitchen can create an awkward disconnect.
The Problem With Oversized Tiles
Many homeowners are drawn to larger format tiles for an impactful backsplash look. Oversized options include 12×24 inch white subway tiles or mosaic sheets that combine multiple small tiles into one larger mesh-backed sheet. While these big tiles seem great for faster installation, they can cause several issues:
Visible cuts around corners and edges: Large tiles inevitably need additional cuts to fit around receptacles, corners, and edges. These sliced sections stand out and look sloppy.
Thick grout lines: With huge tiles, the grout lines between each one will be very thick. This disrupts the smooth uniform grid pattern that most backsplashes aim for.
Partial tiles: To fill the space, you’ll likely end up with some partial tiles around the edges where you had to make cuts. The mix of full tiles and uneven partials appears unbalanced.
Irregular alignment: Non-square tile shapes fit together crookedly since they can’t form even grid lines across the wall. This creates a disconnected staggered look.
Best Practice: Select Smaller Uniform Tiles
To avoid issues with oversized or irregular tiles, choose smaller uniform sizes and shapes for your backsplash. Recommended options include:
3×6 subway tile: This classic size lays in even staggered rows with subtle grout lines. 3×6 tiles are small enough for precise cuts around edges.
1-inch mosaic: Tiny 1-inch tiles form a uniform grid and provide endless creative options for patterns. The small scale is ideal for kitchen backsplashes.
Hexagonal mosaics: For a unique geometric look, hexagonal mosaics fit together in mesmerizing arrangements. The small uniform size keeps grout lines minimal.
‘Mini’ rectangular tiles: Around 3/4 inch high, these miniature bricks form tidy grids. Brands like Caesarstone offer mini rectangular mosaics perfect for kitchen backsplashes.
The smaller-scale tiles suit backsplashes better than oversized tiles. You’ll achieve clean uniform lines and minimal grout with fewer visible miscut line sections.
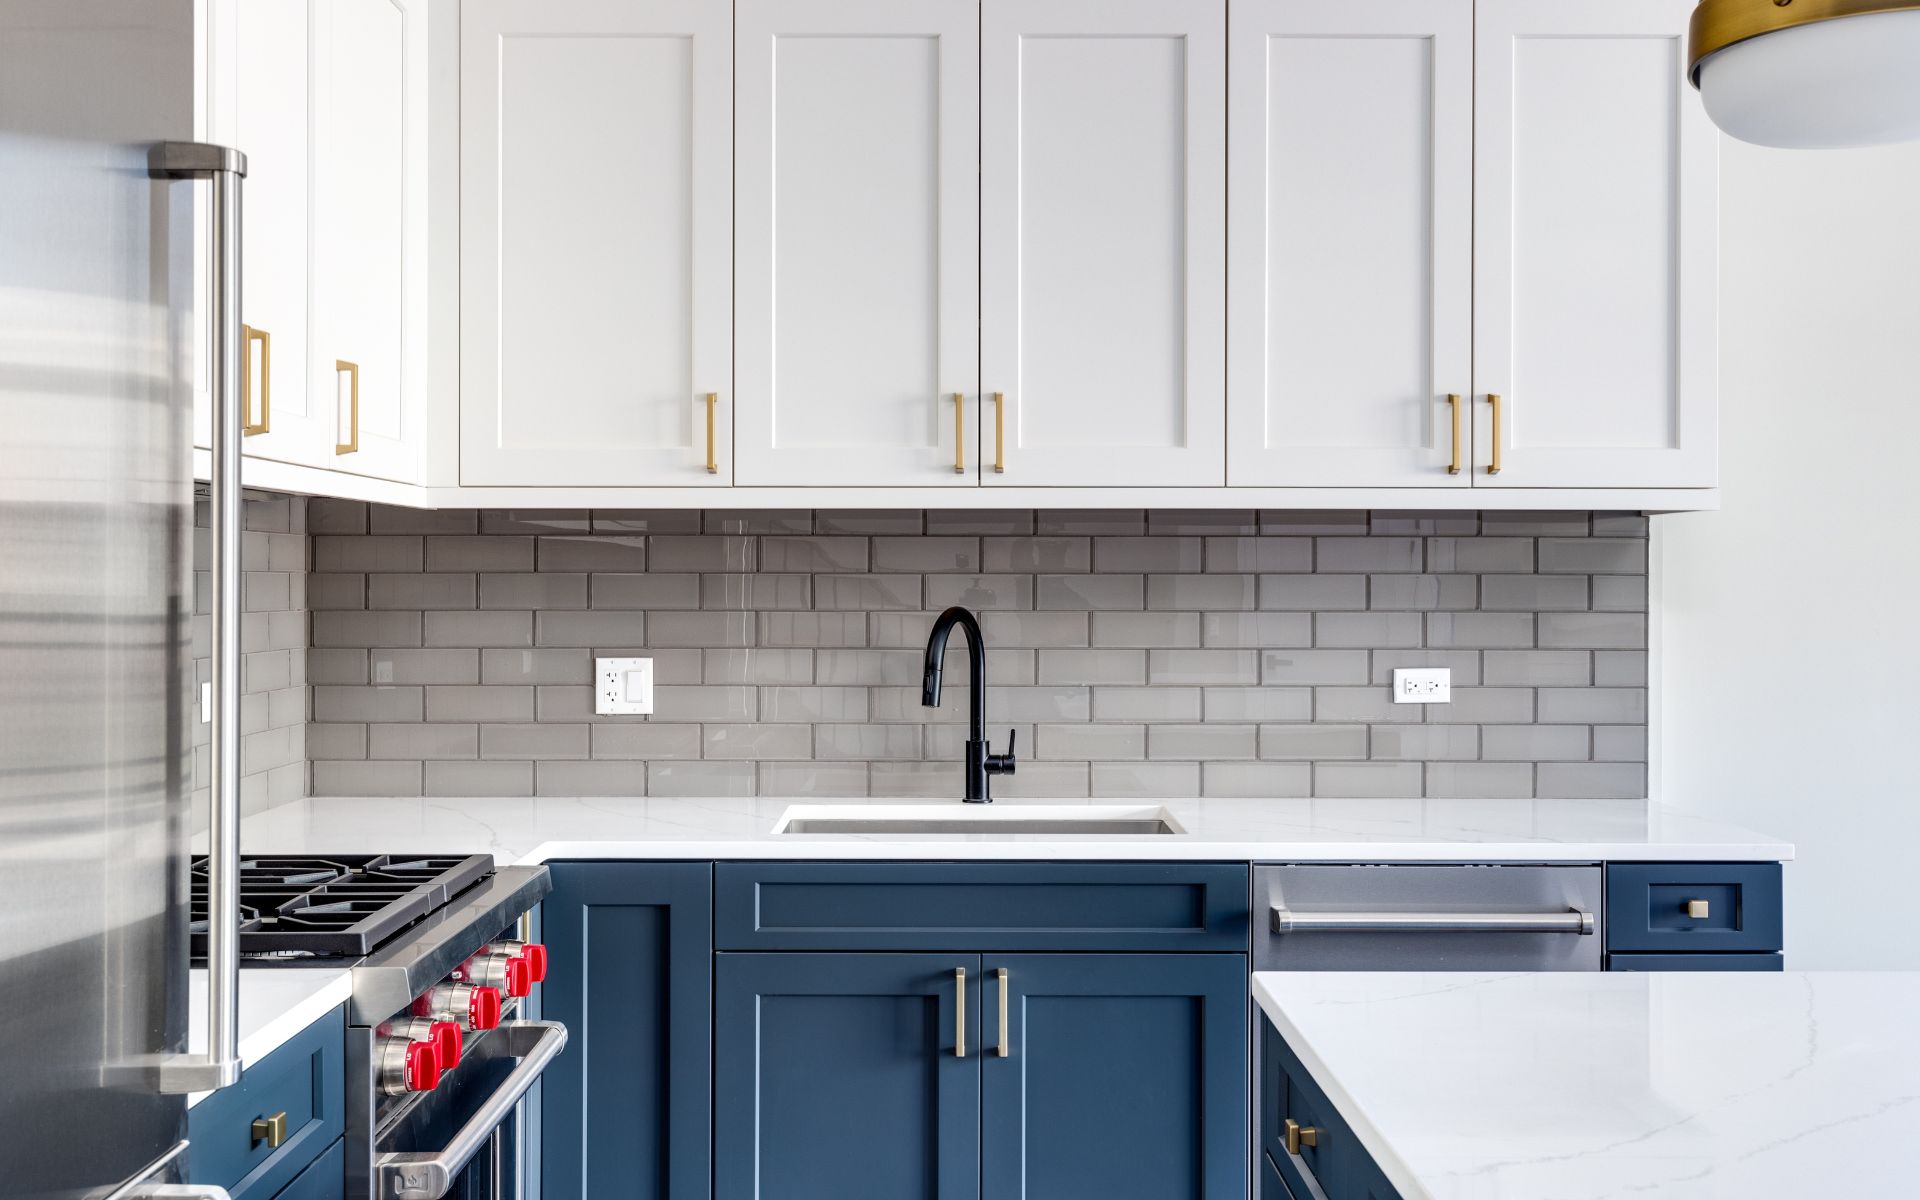
Clashing Design Elements
A disjointed clashing look is another common backsplash mistake. While you want your new backsplash to make a splash and a statement, it should ultimately enhance your overall kitchen design, not compete with it.
Issues Caused by Clashing Elements
Backsplash colors, materials, and styles that don’t complement the rest of the kitchen result in visual disharmony. Problems from clashing styles include:
Fighting colors: Contrasting hues vie for attention rather than blending nicely. This creates a loud, distracting look.
No flow: The kitchen appears fragmented, with elements that don’t transition smoothly together. This causes visual confusion.
Too busy: Strong color contrasts, competing textures, and mismatched styles give the kitchen a cluttered vibe.
Best Practice: Create Cohesion
When selecting your backsplash, look for materials and colors that coordinate well with existing elements like:
Cabinet finishes – For white or light wood cabinets, stick with light glass or subway tiles. For darker cabinets, choose deeper hues like metallic or stained glass backsplashes.
Countertop colors – Match or complement the tones in your countertop material, whether it’s granite, marble, quartz, or solid surface.
Flooring – Make sure your backsplash ties in with the flooring color and style as well. Natural stone or wood floors suit stone backsplash tiles for example.
Appliances – Echo appliance finishes in your backsplash metal choice. Brushed nickel, matte black, or sleek stainless pairs well.
Seek colors and textures that transition smoothly across the whole front kitchen wall, creating a cohesive curated look.
Poor Tile Backsplash Layout
According to the experts at Consumer Reports, some of the most common kitchen and bath backsplash installation mistakes involve poor planning and layout, leading to sloppy tile cutting, uneven grout lines, and mismatched placements.
Problems Caused by Improper Tile Layout
A lack of planning causes most people the following tile layout issues:
Uneven tile cuts: Without sketching layout options, you’ll likely end up with uneven cut sections at edges and corners.
Inconsistent grout lines: Gaps between tiles will be irregular, looking crooked rather than forming straight uniform grids.
Visible transitions: You can’t perfectly align tiles where sections meet if you don’t pre-plan the layout. An obvious transition seems to result.
Awkward placements: Tile alignments around receptacles, edges, windows, etc. wind up disjointed without plotting how they’ll meet.
Sloppy overall look: The finished look appears piecemeal and amateurish, with uneven tiles and lines that weren’t thought through.
Best Practice: Map Your Layout
Invest time upfront sketching possible tile layouts to perfection before adhering to any new tiles anywhere. Considerations include:
Measure: Measure the backsplash area’s height and length as well as any focal points behind the stove.
Sketch options: Draw different layouts on graph paper, visualizing how full tiles and optimal edge cuts can result in straight uniform lines and seams.
Grout lines: Choose a layout that spaces grout lines evenly across the entire backsplash for consistency.
Cuts: Aim to balance tile cuts between top and bottom edges for harmony.
Transitions: Map how sections will transition, like full tiles overlapping the countertop edge.
Focal areas: Use your best full tile cuts to accentuate focal points like around a window or range.
Meticulous planning prevents sloppy tile alignment and creates a sharp cohesive look of a single tile.
Grout Application Mistakes
From uneven color to cracks and staining, poorly mixed and applied grout can completely detract from your backsplash’s beauty. Take time to apply grout correctly.
Problems Arising from Grout Errors
Grouting missteps lead to some unsightly issues:
Inconsistent coloring: Grout that is inconsistently mixed and applied appears blotchy and uneven instead of uniform.
Gaps or cracks: Failing to fill joints or apply even pressure results in weak spots in the grout that crack over time.
Smudges: Not wiping diagonally across tiles causes smears as grout is dragged out of joints. This looks messy and obscures tile surfaces.
Haze: Polishing too soon doesn’t allow haze to fully harden, leaving a cloudy film across the entire backsplash.
Best Practice: Flawless Grout Technique
Applying grout requires care and patience for pristine finished results:
Mix per instructions: Carefully follow product directions for mixing ratios, especially adding pigments for colored grout.
Apply evenly: Fill all joints fully without gaps, using a rubber grout float to apply smooth uniform pressure.
Wipe diagonally: Wipe gently across tiles in diagonal strokes as you go to avoid pulling grout out of joints.
Shape and sculpt: Curve grout smoothly around rounded edges for seamless lines. Shape as needed around tiles.
Allow proper cure time: Give grout at least 72 hours to fully cure before polishing off the haze for maximum durability.
Seal grout: Use a penetrating sealer made for grout to protect it from staining.
The correct grouting technique prevents uneven color, cracks, missing sections, haze, and smudges.
Rushing the Installation
Eager to see the finished look, it’s tempting to rush through the job of backsplash installation. But hurrying the process never yields quality results.
Issues Arising from Rushed Timelines
Cutting corners to speed things up causes the following problems:
Uneven tiles: Prepping the wall and carefully leveling each row of tiles takes time. Rushing leads to crooked uneven tiles.
Messy finishes: Slow precision cutting around edges and outlets gives clean results. Haste leads to jagged rough edges.
Lack of protective coats: Finishing sealants need ample drying time between layers. Rushing this skips important protection.
Uncured materials: Tile mortar and grout need time to fully harden before proceeding. Rushing can weaken bonds and durability.
Sloppy design: A haphazard layout without pre-planning looks obviously messy and amateur.
Best Practice: Schedule Ample Time
Avoid issues by budgeting ample project time for each step:
Shop early: Give yourself a lead time to shop for all materials, tools, and accessories. Don’t start until everything is on hand.
Prep carefully: Allow time to fully clean the wall, remove old backsplash, and repair surfaces as needed.
Work methodically: Install tiles in small sections, completing each perfectly before moving on.
Let materials cure: Give mortar, grout, sealants, etc. the recommended cure time before continuing.
Clean meticulously: Budget extra time for multiple cleanups of dust, debris, haze, and sealants.
Inspect thoroughly: Take time at the end for a careful final inspection to catch any imperfections.
Allowing adequate time for each installation step results in a stunning backsplash with quality craftsmanship.
To Sum Up
A kitchen backsplash can elevate your space with a captivating style when designed well and installed correctly. However small mistakes in areas like tile size and layout, color and material choices, grouting, and project timelines can lead to disappointing results. The good news is that with careful planning and diligent precision installation, it’s possible to avoid common pitfalls.
Think through your backsplash design fully, visualizing how elements come together. Select cohesive materials suited for the space. Meticulously map out tile layouts before adhering. Apply grout with care and patience. And invest ample time in the project from start to finish. Your patience and attention to detail will pay off with a stunning, professional-quality backsplash you can enjoy for years.